Showing posts with label babyfood making. Show all posts

Saturday, March 13, 2010

Finger-Foods: Make Ahead of Time and Freeze!

Because I've got all this disposable time on my hands, it's no object, of course, to prepare a meal for the adults, one for the picky toddler, and one for the babies every single evening.  Right? 

Uh, no. 

Ideally, soon, I can just prepare a meal for 5 and cut up whatever we're having and that's the end of it.  We're close, but not there yet.  And I already find myself having to put way too much thought into food for Jack that I don't really love scouring the kitchen for things that constitute a well-rounded but mashable meal for those with 4 or fewer teeth.  I mean, when I have 3 plates and 2 high chair trays lined up on the counter and I'm plopping different food selections on each, I can imagine I'm just one hair-net short of a cafeteria worker. 

Not my idea of a good time.  So, I pioneered (well, probably not, but I don't think I've seen or heard much about it before) a way of preparing this stuff ahead of time and freezing it just like the purees.

I started out just tossing a bunch of steamed, diced chunks of food into a container and putting it into the freezer.  What resulted was a mass of food that either needed to be reheated as an entire lump (and thus defeating the purpose of the endeavor) or I had to chip off a suitable chunk which resulted in mangling the food and making it much closer to the puree than the girls wanted.

So, I went back to (my) basics: food, ice cube tray, freezer.  I found that freezing the food pieces in the trays was okay, but I had to leave them in the trays and again, defrost en masse.  So, I added water to the trays.  VoilĂ !  I also tried nixing the trays and making little food packets with Glad Press 'n Seal (which is fabulous stuff if you haven't tried it) but that worked better for on-the-go situations and had a little too much waste in terms of packaging for my tastes, but it's not a bad way to go if you don't mind buying the Press 'n Seal.

This is what I did:

Step 1: Prepare your food according to your preferred method.  In this case, sweet potatoes, steamed.

Step 2: Dice your food (if the pieces aren't small enough already) and fill ice-cube trays with the pieces.  In my case, I found that it worked best to cut the sweet potatoes a bit larger for steaming and then cut them down to a smaller size after cooking and cooling as they seemed to hold their shape a little better.

I also prepared peas but cooked them a TINY bit longer than for the puree to make them just a little softer for mashing.

Step 3: After foods have cooled to room temperature, fill the tray with water and put in the freezer.  The water binds the pieces of food together and makes it possible to pop the individual servings out of the tray and into a plastic baggie for storage and easy thawing. 

For this alternate method of storing, I just made piles of diced food on a sheet of Press 'n Seal with the sticky side of the plastic facing up.

Then I simply put another (slightly larger) sheet over the top and sealed the seams, creating little food packs.  I later cut them into strips and put them in the freezer and was able to take out a strip of 2 or 3 pockets and toss it in a bag for lunch on the go.


See?  A frozen pea cube.  Perfect!  I found that each girlie would consume one cube worth of peas and between 1 1/2 and  2 cubes of sweet potatoes at a time.  I just took out whatever  I was going to feed them for dinner at lunch-time and put it in a bowl on the counter to thaw, then drained off the excess water and served - no reheating necessary so as to preserve as many nutrients as possible! 

My happy customer.

Mmm - Goldfish, tofu and sweet potatoes for lunch.  Addie loves to eat.

Nearing the end of a meal... playing with the food is always a good sign that she's full.


Jordan's happy fat kid face.

I tried this for sweet potatoes, peas, beans, cooked pears, peaches, apples, blueberries, and butternut squash.  I don't recommend cooked blueberries as a finger food - it was a royal mess.  Instead I just bought fresh blueberries and cut them into quarters.  It was way better.  If you do cook the fruit, don't cook it for as long as you would for purees - about 15 minutes in a 350 or 375 oven will be enough to soften the fruit and start to break down the sugars without making them too soft for inexperienced fingers to pluck off a tray, likewise with the squash.  

I hope this helps you save a little of your valuable time and sanity - like with the pureed baby foods, it certainly saves money instead of buying the jarred Gerber Graduates type "meals" and cuts down on your prep time significantly on a day-to-day basis.  Just remember to keep all of your surfaces clean and germ-free during the entire process.  

Have fun!

Friday, March 12, 2010

Baby-food: Moving to Finger Foods

NOTE: This is only what has worked for US after we've made sure the girls are ready.  You should evaluate what's right for your child or children and always be mindful of potential allergy and choking hazards associated with introducing new foods.

Okay all that nonsense aside, introducing finger foods is one of my favorite things in the world... I'm an eater.  I love watching them taste new stuff and experience new sensations and I love that they get to fit in with us while we eat.  (And, in the spirit of honesty, I love that a handful of Cherrios can now buy me a few minutes of sanity here and there throughout the day.)  Jack is also a big fan of getting to share the things HE eats with his little sisters and they delight in partaking in family meals and snack time.  Basically, it rocks.

Now, we've been at this for awhile.  We started with Gerber Puffs, which I love as a first finger food because they dissolve in contact with saliva so I can be a little less paranoid about choking.  Shortly after I can watch them tackle puffs with dexterity, I start branching out a little.

The next couple of foods are similar to the purees, but instead of pureeing, I cut them into little pieces, often adding wheat germ or crushed cereal to give stuff a little extra traction.  Here's what falls under this next "phase" for us: sweet potatoes, cooked pears, cooked peaches, cooked apples, bananas, avocados, steamed peas and steamed beans.

Sometimes, admittedly, that's a lot of work to deal with.  So, if you stay tuned for another post in the next couple of days, I'll show you the method I've come up with for preparing these foods ahead of time and freezing - like with the purees - individual portions to ease meal times.

I also cheat occasionally buy buying canned pear halves or peach slices (always making sure to buy fruit "in 100% juice" instead of any kind of syrup).  I see no shame in that. 

When those foods prove to work out well - and it's just a matter of making sure the girls can mash them well and are enjoying the textures since we're already introduced those foods as purees - I move into the next "phase".  I cube whole-wheat bread, offer whole-grain Ritz crackers, and Cherrios and Kix and the like.  This is also when I add what has become Addie's favorite food: tofu. 

Oh that girl loves her some tofu.

I buy the firm tofu and cube it up and Addie adores it.

Now they eat cheese (soft cheese or shredded cheese) and the occasional french-fry, and I feel good offering Fig Newtons and Nutrigrain bars (cut up) and sometimes well-cooked pasta.

They devour food with intensity and enthusiasm.  I love it. 

The other night I made beef stew with carrots, celery, onions, beans, peas, corn and barley.  I strained the broth and took out the beef cubes and put a pile of the veggies on their trays and they contentedly ate every last morsel.  And asked for more.  So I gave them more. 

They're nearly 10 months old.  I'm not too worried anymore about food allergies and I've even heard that the AAP has changed their recommendations recently to indicate that delaying the introduction of allergy-inducing foods doesn't seem to keep children from developing allergies.  (Note: I am not speaking FOR the American Academy of Pediatrics, and again, please discuss any questions with your pediatrician before making decisions for your family.)  That being said, I usually give the girls a little bit of what we're eating and a some of the things they're used to. 

And you know what?  They eat everything.  Well, except for spinach.  Addie touched spinach and had a panic attack so I took it away.  Now she won't even look at it.  So they eat NEARLY everything. 

Cool. 

Thursday, January 28, 2010

My Culinary Love Affair - Wheat Germ

Okay I am obsessed OBSESSED OBSESSED with wheat germ.

My husband thinks I'm crazy.

But I LOVE it.  I add it to all the babies' purees now.  I mix it into every possible recipe I can.  I sprinkle it on salads and on diced fruits for the girls.  I sneak it into PB&J sandwiches.  I love wheat germ.

What the heck is it?  Germ? What?  Ew.

Nope, germ is short for "germination" and refers to the fact that wheat germ is like a wheat kernel embryo.  It's just where new wheat kernels sprout and is super rich in nutrients like... oh, EVERYTHING.  Nutrients such as B vitamins (folate, niacin, thiamin, and vitamin B6), Calcium, Fiber, Iron, Omega-3's, Potassium, Magnesium, Manganese, Phosphorous, Protein, Selenium, Zinc and Vitamin E.  Wow.

And it's not technically a food. 

Wheat germ comes in two basic varieties: raw and toasted.  I use toasted for a few reasons: 1) it tastes better, 2) it's easier to find, and 3) it lasts a little longer.  The toasted wheat germ has a light nutty taste to it that all but disappears from notice in things like sandwiches and salads or even in meatloaf or meat balls, and it lends a little somethin'-somethin' to oatmeal or waffles or muffins or cookies.  The only real key thing is, you have to store that stuff in either the freezer or fridge so it doesn't go wonky on you.


So in addition to mixing in in with whatever breadcrumbs I might use in a recipe, such as this one, you can just add it into cookie or muffin recipes or swap out 1/2 cup of the flour in the recipe for 1/2 cup of wheat germ, for instance.  I also made breakfast for the girls the other day by mashing up a banana:


And stirring in a couple tablespoons of wheat germ to get this:
 
It may look gross, but it was really yummy.  It cuts down on the "snot factor" as I call it... Bananas, when mushed, are a little slimy and my kids aren't huge fans of the texture, but the wheat germ gives it some grit (insert manly chuckle here).  I tasted it and determined it was quite tasty, so I later did the same thing for myself but smeared it on a piece of bread and smushed that on top of another piece of bread that I'd coated with peanut butter and I thought I was in heaven.  Then, I tossed some mini chocolate chips into the sandwich when I realized how awesome the "banana jelly" was and essentially considered myself a genius at that point.  Now, did the wheat germ make that heavenly sandwich?  No.  Not at all.  BUT it was there and I was able to use its presence to justify eating a sandwich made with chocolate chips and not feel in the least bad about it.
Okay, so maybe to some wheat germ is a nutritional supplement.  To me, however, it is probably more of a crutch. 

Whatever.  I'm lactating.  Back off.

Anyway, so there you have it.  I *heart* wheat germ.  And I make no qualms about the fact that it goes in mac 'n cheese and into my home-made pizza crusts and into the breading on my chicken nuggets and it holds my hamburgers together so if my picky kid only takes one stinking bite of something I toiled for hours to make, at least that one bite has as much goodness as I can feasibly pack into it.

Monday, January 11, 2010

Baby Food: Chicken!

Well, it's time.  Time to get my girls going on some legitimate protein.  Obvious choice?  Chicken.  I mean, there's protein in peas and of course in breast-milk or formula and some in the cereals they eat, but let's kick this up a bit.  Let's give them meat. 

Intimidating, right?  Don't be scared - it's not much different from any other puree we've done so far.  In fact, it's easier than some (uh, anyone forget how much of a pain it was to strain those peas?  I didn't.) and serves as a great base for mixing some yummy dinners. 

Step 1: Obtain chicken.  I selected chicken thighs in part because they're absurdly cheap and mostly because a) they're dark meat and therefore more moist and flavorful than the breasts and b) they're pretty easy to work with.  I used 2 packages.  I'm a fool - my daughters are intense eating machines so I could have easily made about 9 packages and not have over-done it.


 Step 2: Arrange in a baking dish and bake, at 350 for about an hour.
 

They should be done all the way through - I used a meat thermometer to double check.

*Optional step: Reserve all the juices the chicken produces while cooking.  I pour it from the baking dish into a large measuring cup and let it sit on my cold counter top for awhile so the fat separates into a layer on top.  I skim it off and hang onto the leaner juice that remains to add to the puree in addition to the water I'll add because it lends a bit more flavor.
 

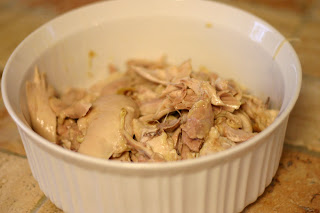
  Step 3: Remove and discard the skins and any excess fat you don't want to serve your kiddo and remove the meat from the bones.  There's no particular method here and it doesn't need to look pretty.
 

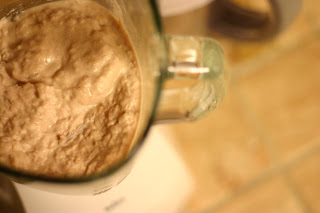
 Step 4: Blend.  But "blend" is not quite that simple.  You can't just put the chicken in the blender, hit "puree" and go... It takes a little more finesse.  The best way to achieve a good chicken puree is to add a couple of chunks of meat and a good 1/2 cup of that leftover juice, blend that up and slowly add more chicken, alternating chicken and liquid as you go, otherwise you're going to gum up the works and fry your blender (speaking from tragic personal experience).  I also recommend blending your chicken - if you make 2 packages of thighs like I did - in two batches.  
 

It looks disgusting.  No doubt about that.  And you shouldn't try this one if your child isn't huge on texture yet... it's pretty hard to get a perfectly smooth meat puree.  And it's important that I point out that a puree of chicken will freeze nicely but thaw a little roughly.  It just doesn't reconstitute into the smooth texture you put into the freezer.  It was a huge turn-off for my son, but I'd just mix it with peas and sweet potatoes or with some apple puree and he didn't even notice that his chicken was a little grainy.  My girls would eat a drumstick if I let them, so they don't care.  Just make sure you check all of your baby food for lumps before you begin feeding your child so that they don't choke on a hidden chunk.


 It doesn't smell too bad... and when they get a little older I'll "season" it with a touch of garlic and a teeny bit of black pepper and it doesn't taste bad at all!

Step 5: Freeze if desired.
 

Thursday, January 7, 2010

Toddler Food... Coming Soon!

Well, faithful reader(s?), you've asked and I will deliver: tasty, creative toddler food!

(But, um, not today.)

Many of you have read post after post about making your own baby food and how to do that, and a few of you have asked if I have ideas for yummy ideas on what to feed our older babies.  I'll admit, my toddler is a very, VERY picky eater and actually, we just had him evaluated by an occupational therapist for possible Sensory Processing Disorder (he doesn't have it, or if he does, it's not severe enough to bother with formal therapy).  Though that was somewhat of a dead-end, the therapist did give me some interesting ideas for how to present food to Jack to help expand his diet.  It's a frustrating situation because I made his baby food and I exposed him to a GIGANTIC array of different tastes and textures and whatnot.  Being a "foodie" myself, and being a single mom for some part of that stage of his life (Daddy was out to sea) I had no problems immersing myself in food - selection, preparation, presentation and introduction with Jack as my little sidekick.  So his picky eating as a nearly 3-year old is an aggravating and mystifying problem with which we struggle daily.  Somewhere between his tofu- and garbanzo bean-eating days and today, his palate has restricted itself to the mundane flavors of the childhood stand-bys: chicken nuggets, hot-dogs, french-fries and strawberries.

*sigh*

I feel like a failure.

I guess I'm partially to blame - the introduction of the girly twins to our family dynamic didn't leave me with much time or energy to fight with him over meals.  Maybe I even enabled his tendencies by using my Sam's Club membership to purchase hot dogs in insane bulk quantities and simplify my life a little.  But what I'm left with is a kid whose lunch box is as predictable as the plot of House.

*bigger sigh*

THAT, however, is not to say that I don't know of - nay, DREAM of - fun, exciting, nutritious toddler meals that would make perfect blog-fodder for those of you who are finding yourselves immersed in the glorious world of Lunchables and Happy Meals.  And you know what?  If I commit myself to offering those ideas along to you, it will hold me accountable for breaking out of the preservative-filled trench into which we've fallen and might just do us all some good.

So, what do you say...?  Wanna join in this endeavor with us?  I'd welcome some fellow explorers of the foreign lands of well-rounded toddler eating habits!  Perhaps I'll even get some MckLinky action involved and you all can share your ideas, tips and recipes too! 

Oy.  Now it's out there.  Now I have to be on top of it.  I'm nervous.

Tuesday, January 5, 2010

Millions of Peaches...

... Peaches for baby!

Usually I like to use this method for peaches, but I can't find for the life of me, any fresh peaches up here right now.  I'm not going to stop hunting.  They are a billion times better tasting (though not any healthier!) than the frozen peaches I had to settle for.  So, I end up using this method instead:

I just steam some frozen peaches the same way I did my peas and beans etc. except I don't strain (as I do peas) afterward and I actually reserve the liquid in the bottom of the pan and freeze it as cubes on its own to mix with cereal or to cool down other food that's gotten too hot or to give in a sippy cup to ease constipation.

It's easy!


Sunday, January 3, 2010

An Apple a Day... Baby-Food Apples

Wanna see me be lazy?

Here:

THIS is how you make apples... You know... the same way you do pears... but with apples.

You could also cut them up into little pieces and steam them, but the baking is a million times tastier. 

I'm actually getting ready to start introducing a few little bits of finger foods and diced, baked pears and apples (so they're nice and soft!) make a great choice.  I'll post more on that later.

Wow.  That WAS lazy.

Friday, January 1, 2010

Babies' First Food: Avocados

I do avocados as the first food (after cereals, which I use to get them used to the spoon more than anything) because it is a nutritional power house.  Omega-3's, protein, crazy amounts of vitamins and high calorie density make an avocado one of the best foods you can give your kids.  Plus, you don't need to cook it.  AND if you're like me, leftovers are a welcome treat to smear on a sandwich.

So, I give you, the avocado:

Step 1:  Get your ripe avocado

 Step 2: With a large, sharp knife, slice all the way around it so it falls into 2 halves.
 
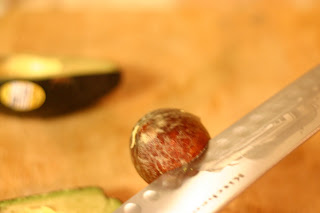
Step 3: Remove brown spots and the pit.  My favorite method of stress-relief pit-removal involves whacking the pit with the knife so it's embedded and then twist... the pit pops right out, then you turn the knife on its side, give it a good whack over the garbage can and you're pit-less!
 
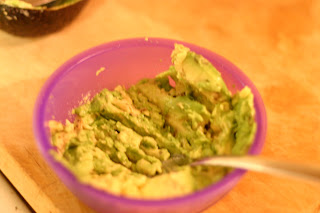
 Step 4: Mash with fork!  Yay!  Delish!


Thursday, December 17, 2009

Prunes for Babies?

Right? Gross.  But wait.  Seriously.  Don't laugh - they're actually not only quite yummy, but extremely good for you.  And, though you don't want to overload your kiddo with them (funny story at the end of this post regarding prunes) they're sweet and mix well with lots of other foods and can help maintain digestive health.  Besides, have you READ the nutrition label lately?  They're little food powerhouses with antioxidants galore.  So stop being grossed out and let's make prunes!

I should probably say something about how I wasn't paid and yadda yadda but I'm small-time here and this just so happens to be what our grocery store carries.

Step 1: Squish the centers of the prunes between your fingers to check for pits.  Though they're pitted, sometimes a pesky pit escapes and plagues your prunes which spells disaster for your puree.  (Rock on, alliteration!)  If you find one, either pick it out, discard the prune or eat it yourself and spit the pit out.

 Repeat until you've used about 2/3 of the prunes in the container (this one was an 18 oz. package), and place the prunes in a bowl (or giant measuring cup, as in this case).

Step 2: Add some water.  I say "some" because it depends really on how many prunes you've got.  But enough to just cover them.  This water is going to be in the puree, so if tap water is an issue for you, use boiled or filtered water.

See?  They look gross.  The goal here is to re-hydrate them a little bit.  Makes them softer.  Your blender will thank you.  Throughout this process, actually, it's important to note that prunes are a dried fruit.  You'll see; it comes into play later on.

Step 3: Wait.  Wait an hour or two or more until the water is discolored and the prunes are soft and puffy looking.  Basically, they need to get really disgusting to look at.  My husband was repulsed.  It was funny.

Step 4: Add all the water and a few prunes to your blender and crank it up.  Make sure the lid is on when you turn it on because it can be a bit violent.  You can take it off once it gets going, but watch out for that first surge of action! 

Step 5: Add the re-hydrated prunes a few at a time while the blender is on and let it blend them really well before you add more.  I should also probably mention here that this puree ends up with some small flecks of fruit throughout it, as you can see.  With each addition of fruit, you'll get a darker color.

Optional Step 6: Add a few non-re-hydrated prunes (like, directly out of the package) if you finish all your re-hydrated prunes and your puree is still too runny.  Be aware though, pureed prunes will continue to thicken slightly for a time, and adding non-re-hydrated prunes will intensify that phenomenon. Let me explain.  Because the prunes are dried, you soak them in water and the cells start to puff back up.  If you chop the prunes up, as in a blender, you expose more cells to water so eventually you end up with a really thick goo of plump prune cells.   Okay I'm not a scientist, but you get the gist.  So when you're adding additional prunes (if you decide to do so) make sure you blend it to a step or two below your desired thickness and call it quits or you're going to end up needing to thin it out later.  The finished product should be about the same color as milk chocolate.


Prune puree also doesn't freeze well... That is, I've never gotten it to work well in the ice-cube trays.  If you've got those cool storage cubes, go for it.  But they don't really freeze solid so you can't so much pop them back out of the trays.  So I freeze it in regular plastic containers in quantities that will last me about 3 days and just take them out of the freezer and put them in the fridge when I empty a container.  That way, I've always got some on hand.  They seem to go really well with sweet potatoes, and my girls have enjoyed them mixed with a mashed banana and oatmeal for breakfast. 

Now, here's the promised funny story.  Hopefully Justin won't read this; he'll kill me.  But I'm a risk-taker like that.  So.

One year, we were down in Orlando with his family.  We went to the store to stock up on some snack foods to enjoy in the time-share villa they've got and we happened upon the packaged fruit aisle where I grabbed a box of raisins and some banana chips to munch on. Justin saw a bag that said, "Cherry Flavored Dried Plums" and said, "Wow! Yum!  I like cherries AND plums - score!"  I raised an eyebrow but figured that my man knew what he was doing.  Back at our place, we all opened up our snacks and headed to the pool to read and relax.  Not much later, I heard him crumple up his bag and saw him toss it in the garbage.  "What's wrong, you didn't like them?"  Justin: "No, they were delicious!  I just finished them all... sorry, did you want one?"  Me: "Uh... the whole thing?"  Justin: "Yep.  Why?"  Me: "Hon, you just ate a pound of prunes... you sure that was a good idea?"  Justin: "What are you talking about?  Those were cherry flavored dried..."  Me: "...plums.  Right.  I got it.  What do you think a prune is, Just?  A prune is a dried plum.  And they make you poop."  At this point, realization set in and Justin's face blanched.  Sure enough, a few hours later he disappeared into the bathroom in the villa and no one knew where he had gone until the tell-tale smell alerted us to the fact that the dried plums were indeed doing their work.  Several hours later, a very pale and visibly shaky Justin emerged to gales of laughter looks of pity and understanding.  Now, you can bet he knows what a prune is and you know he only eats a few at a time.

The end.


Baby Food: Pear Perfection!

I love to make pears.  First, they're easy.  Second, they mix well with just about anything.  Third, they're a great source of fiber in case your kiddo is having a hard time with hard poo with the increase of solid foods.  Plus, they're delicious. 

So the technique I use is baking.  Honestly, pears are so soft and yummy that you really don't NEED to cook them if you don't want to, but I caution you: little tummies can have a hard time digesting those raw sugars and can end up gassy.  Plus, I just feel better about the heat+germs=safe equation, especially since I freeze and defrost my kids' food.  You could also cut them up and steam them or cook them in a wee bit of boiling water Ă  la applesauce... BUT, I choose to bake them because baking them really brings out their delicious flavor and makes a pretty darned yummy dessert for bigger people as well.

So, pears were on sale.  I use Bartlett and let them ripen just a little so they yeild to pressure but aren't mushy.
 
Step 1: Wash and halve pears, then core them.  If you have a gadget to do this, by all means, use it!

Step 2: Arrange pears in a shallow baking dish and add about an inch of water to the pan.  Bake at 350 for about 35-45 minutes, checking regularly after the first 30 minutes or so.

I sincerely wish I could take a picture of smell.  These are so fragrant and delicious!  See how they're slightly golden and the edges of the skin are starting to curl?  Perfect!

Step 3: Peel and blend!  If you want, you could try tossing the hot pear halves into a bath of ice water to see if it helps the skins slip off.  You don't even HAVE to get rid of the skins, but I do because they're a little harder to digest.  I do not worry, however, about getting every last piece of peel off.  And blending is a cinch since they're so soft!

If you want, keep a couple warm pear halves aside and sprinkle them with cinnamon and drizzle with honey... add a dollop of Cool Whip and you're in for a yummy treat!  If you want, prepare an extra dish of these and bake them with the cinnamon and honey already on them.  Yum!


*Note: I also reserve the water that's left in the baking dishes (since you won't need it to get a smooth puree) and freeze the water itself separately because it's mighty handy to add a cube of pear juice to a dish of baby food that's too hot and needs to be cooled down or to thin out extra-thick cereal... or just to add a flavor punch to something. 


Monday, November 30, 2009

Beans, Beans, the Magical...

... No, not that kind of beans... yet.  Green beans!  These are super easy, but they're very... green tasting and my kids don't like them much so I mix a couple bean cubes with a pea cube and it goes a long way to making them tastier. (I'm not much of a bean fan myself, actually.)  I don't strain these because, again, my kids like their foods more texturey and the straining step is necessary for peas because the hulls actually make them super gassy.  To my knowledge, that is not the case with beans.  So here we go:

Step 1: Steam (or blanche) frozen green beans just until tender and no longer frozen.

They should have a lovely bright green color and have a good snap to them.

Step 2: Add to blender and blend.  You probably won't need any additional water, but if you do, make sure you've reserved that cooking water and use that instead of regular tap water.

This is how much a regular bag of frozen green beans will make once pureed.

Step 3: Spoon into trays and freeze!  Done!   Yay!  If you want to strain, feel free, but you will lose some volume.  If you want to make them super smooth, I'd go ahead and strain, then re-blend them.  But I don't. 

LinkWithin

Related Posts with Thumbnails

What I Write About...

babyfood making (14) blogging (30) Brain Vomit (11) breastfeeding (3) bugs (2) children (88) cooking (5) crafts (1) family (28) friendship (10) germs (4) house (6) housework (41) humor (50) life (60) manners (3) marriage (12) me (40) parenting (46) pet bunny (5) photographs (64) politics (1) pregnancy (15) recipes (2) reflections (50) relationships (5) school (2) summer (10) toddler food (5) TV (3) twins (19) weird (4)