
But I decided to make some butternut squash to follow peas (we've done cereals, then avocados, then sweet peas, and now squash) mainly because my husband loves butternut squash soup. So today, I give you: BUTTERNUT SQUASH! And the bonus: butternut squash soup!
Awesome, right? Yes, very!
So, full disclosure: I started with 8.53 lbs of squash. That's a little absurd. It took me 4 dishes to bake it all, but I got a TON of yum for my money.

Step 1: Chop the ends off. Or, if it's a big squash, like these, chop the smaller end off and wait until you hack it down to a more manageable size to tackle the bottom end... or just don't worry about it. But I like to square off the bottom to make it more stable for cutting. Because I'm accident prone.

Step 2: Chop the squash in half so you're separating the skinny end from the bulbous end. Then, turn each of those pieces on it's end and cut them in half length-wise.

Step 3: You'll have exposed the seeds in the bulbous end after you make the 2nd cut. Use a spoon to carve out the seeds and the stringy ick.

Step 4: Place all of the "quarters" into baking dishes, cut-side down. Add about an inch of water to the dishes.

Step 4: Bake at 375 for about an hour or until the tops are brown and wrinkly...

...like this. You should also be able to sink a fork into the meat very easily.

If you let the squash sit for a little while, you'll notice that they absorb the water from the baking dishes. This is a good and awesome thing as it makes your life easier. As before with the peas, if there is any leftover water, save it for thinning the puree later if necessary.

Step 5: Use a spoon or a fork or your fingers (if you let the squash cool off!) to peel the skin off. It should come off pretty easily, but this part is really messy for me, no matter how hard I try to stay organized. (And please ignore the random junk on my counters!) Sometimes, I find it's a little easier to flip the squash over and scoop it out of its skin with a spoon.

Step 6: Add to a blender and puree the snot out of it! It doesn't go as quickly as the peas did, and you might have to pause a good number of time to stir the contents of the blender... thingy... and squish it down and maybe even add water. Be patient - it's worth it if you consider there isn't any straining necessary!

Mmmm.

You should end up with a pretty good consistency thanks to the absorbed water. I didn't add any extra water to this batch, but I did to a later batch. Also, my babies enjoy a little thicker texture, so if yours like it runny, thin it out some more. A word to the wise though: sometimes it makes more sense to freeze the food in a thicker consistency than you'd feed your child for two reasons: a) sometimes the thawed cubes are runnier because of frost from the freezing process and water released from the fibers of the food in the cold and b) it's always easier to add a little milk, water or formula to thin it out later if it's still too thick. Conversely, if you do either make it too thin to begin with or it winds up being too thin when it thaws, I keep some rice cereal on hand to stir into the food to thicken it right up. But don't freeze the food with the cereal added - it does funky stuff to it somehow.

Step 7: Fill your ice-cube trays, cover with plastic (if you'd like!) and freeze! Here's my baggie o' cubes! My girls like to eat 2 cubes each twice a day of this stuff!

Now, on to the soup! I really love the slightly nutty flavor of this soup and it's delicious as a first course for a holiday meal. I tend to pair it with baked chicken and veggie medley.
Step 1: This is about 3 cups-ish of pureed squash prepared at the same time as the baby food version, so it's already baked. That's great news and makes this a really quick meal! I've also been known to thaw a few cubes out and whip this soup up in single servings for hubby's lunch... Transfer the squash from the blender to a pot. If you wanted, you could probably do it all in a blender and heat it through later, but this is how I do it and this is my blog, so deal.

Step 2: If you're working with the 3ish cups of squash, add some milk to it... about 3/4 cupish. See, it gets fuzzy because it depends on how thick your squash is to begin with and gets even ish-ier from there. But start with 3/4 cup.

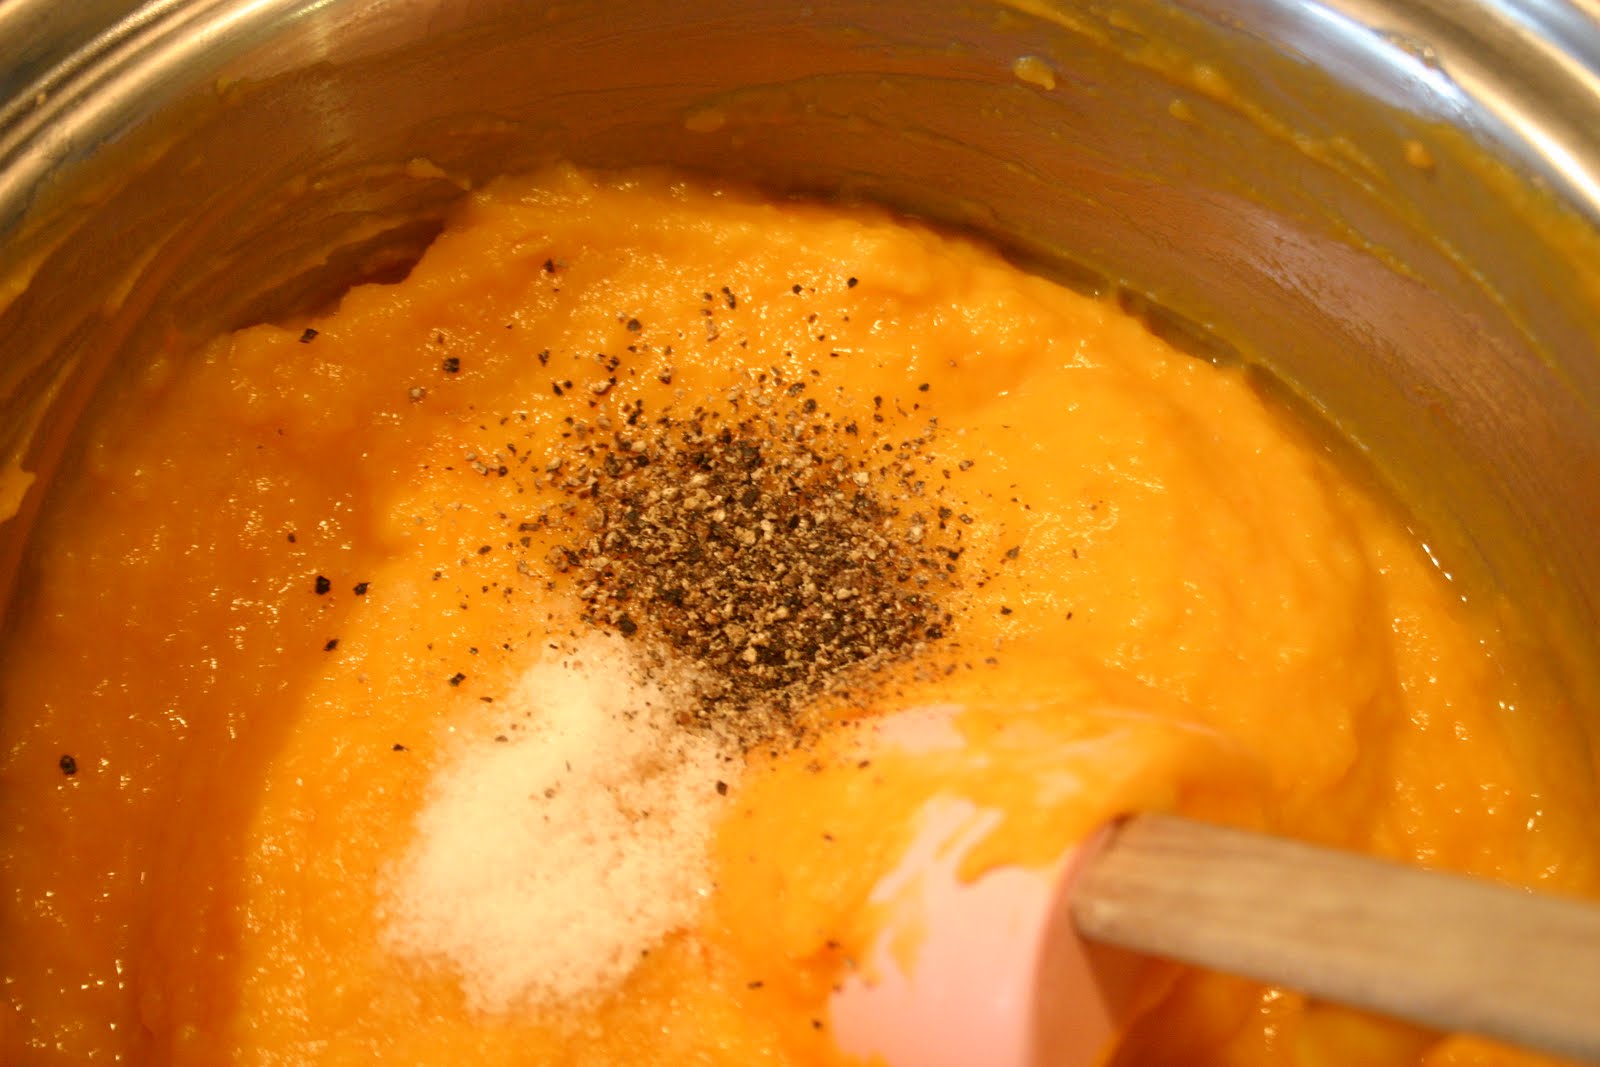
Step 3: Add some salt. I use sea-salt and I add a little extra later for hubby, but this is probably a tablespoon.

Step 4: Ditto for the freshly ground black pepper.
Step 5: Sorry about the picture quality... I apparently had too much coffee for breakfast. Anyway, the secret ingredient is ground nutmeg. Add one dash.

Step 6: Once all your spices are added to your extremely thick, gloppy mixture, thin it out to your desired thickness with chicken stock...

...See? I like it to where it coats the spoon. Think... Cream of Mushroom type thickness. It's totally up to you. You could add more milk at this point, but to make it more like a soup than a runny "mashed squash" deal, I use the stock.

Now your whole family can enjoy butternut squash!
7 comments:
*droooooooollllll* We'll be over in an hour...kay? ;o) Those girls (& boy) are lucky to have such an awesome mama who makes them homemade food!!!!
Just sent you an email with my version of the same soup. Slight variations, but also fab if you're so inclined!! Enjoy!
You've inspired me to make my own baby food, I'd planned to all along but it was just so much easier to buy the jars. haha. Soup sounds amazing!
You rock! You've inspired me, next time I'm going to attempt homemade baby food.
So I have never cut squash like that- I always do it length-wise, and fear that I'll end up in the ER needing stitches each time I do it (and I make squash a LOT!). Thanks for showing how you do it- it seems a lot safer;)
Love,
C:)
So I have been slacking on the puree thing, although we did just puree a TON of sweet potato. I HAD a squash, but forgot about it. A month later, I had to toss it.
But this makes it look so easy. I basically do this to cook ours, but there were a couple steps I think will make it easier, so thanks!
And I still give you credit for the 3 columns on my blog....would have kept it, but wanted to simplify with less columns again. Just added pages instead to get it all off the main page.
Would have kept my original graphics but it was from the website my friends and I used to run (Suburb Moms), and I told them it'd be used temporarily. Kinda had to get something else.
Ok, off to puree (kidding, off to eat a granola bar, but will puree later, I promise!).
Hope you win (so you can stop using your foot stuff for your hands. Hey, we're all guilty of it!).
We love that soup over here too, but I leave out the pepper and add homemade chunky applesauce. It's sweet enough for the kids to gobble up, and makes awesome leftovers!
Post a Comment